
SwiftGen is a popular code generation tool for iOS projects that helps developers to manage resources like images, colors, strings, and fonts more efficiently and make them type-safe to use. In this guide, I'll walk you through the steps to set up and use SwiftGen in your iOS project.
Step - 1 Installation
The SwiftGen can be integrated into your iOS project using different methods, depending on your preferences and project setup. Common ways to install SwiftGen:
1. Using CocoaPods:
To install SwiftGen with CocoaPods, follow these steps:
- Open your project directory in the terminal.
- If you haven't already installed CocoaPods, you can install it using the following command in the terminal:
- Create a
Podfileif you don't have one already by running:
- Edit your
Podfileto include SwiftGen pods. Add these lines:
platform :ios, '9.0'# Adjust the iOS version as needed use_frameworks! target 'YourProjectName' do# Replace 'YourProjectName' with your actual target name pod 'SwiftGen '# Add more pods for other resource types if needed end
- Save the
Podfileand run this command in terminal:
- Now, close your xcode and open the project directory in Finder.
- Click on
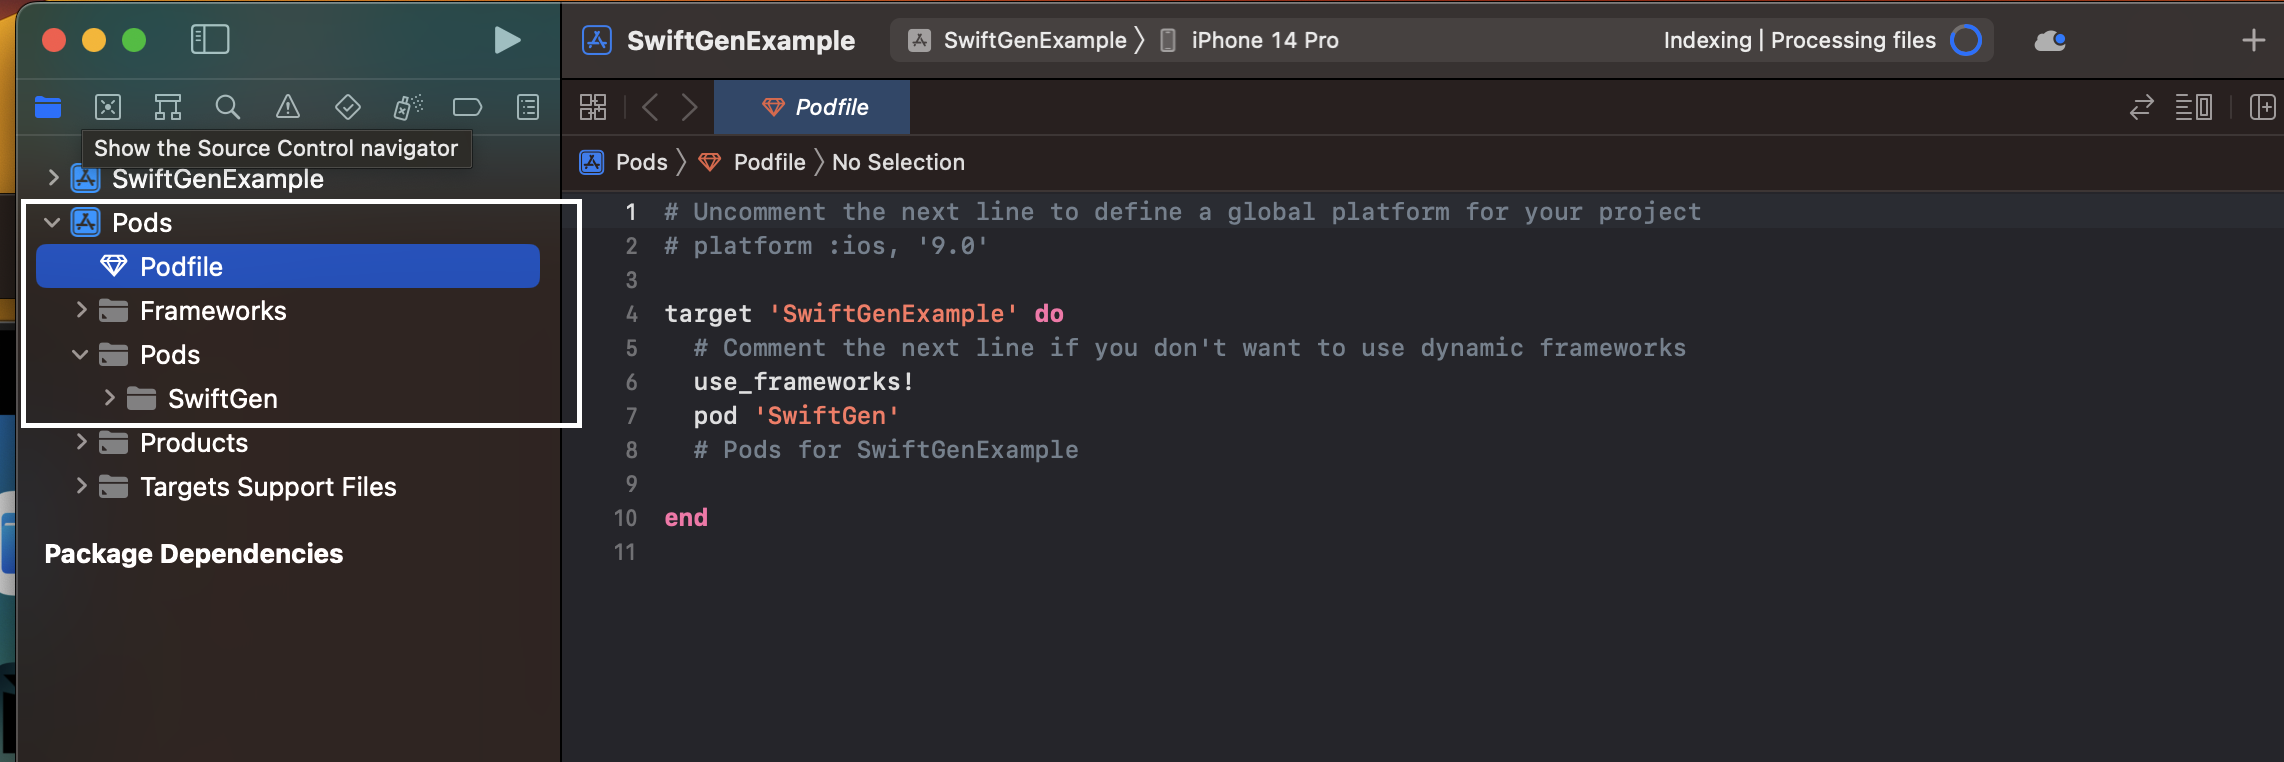
YourProjectName.xcworkspaceto open your project again. - After successfully installation, you can see SwiftGen pod in your pods
2. Using Homebrew:
This will install SwiftGen system-wide. The same version of SwiftGen will be used for all projects on that machine, and you should make sure all your coworkers have the same version of SwiftGen installed on their machine too.
You can use homebrew to install SwiftGen on your system. Here's how:
- Open the terminal and run the following command to install SwiftGen using Homebrew:
- After installation, you can run
swiftgencommands globally from the terminal.
Step - 2 Create SwiftGen Configuration Files
SwiftGen uses configuration files to understand where your resources are located and how to generate code for them. SwiftGen supports various types, including Assets, Strings, Fonts, Colors, Plist, InterfaceBuilder, and CoreData.
In the root directory of your project, you need to create a new empty file with name swiftgen and the .yml extension swiftgen.yml in which you have to indicate the path of your files that need to be generate and the path of generated files.
For the output of generated files you have to create New folder/New Group in your project directory where all your generated files will be placed.
Once you have created configuration file, now you have to specify paths of your input and output files in the swiftgen.yml file. Formats for generate different kind of resources are here:
- For generating xcassets (Assets and Colors)
xcassets: inputs: - path-to-your/assets-folder/Assets.xcassets - path-to-your/assets-folder/Colors.xcassetsoutputs: - templateName: swift5 output: path-to-your/generated/Assets.swift
- For generating strings (Localizable)
strings: inputs: - path-to-your/strings-folder/Localizable.stringsoutputs: - templateName: structured-swift5 output: path-to-your/generated/Strings.swift
- For generating fonts
fonts: inputs: - path/to/font/diroutputs: - templateName: swift5 output: path-to-your/generated/Fonts.swift
- For generating storyboard scenes and segues
ib: inputs: - path/to/storyboardsoutputs: - templateName: scenes-swift5 output: path/to/generated/StoryboardScenes.swift - templateName: segues-swift5 output: path/to/generated/StoryboardSegues.swift
- For generating Plist file
plist: inputs: - path/to/Info.plistoutputs: - templateName: runtime-swift5 output: path/to/generated/InfoPlistKeys.swift
Note: Ensure that you maintain proper spacing at the beginning of lines to prevent compiler errors in the YAML file.
Step - 3 Generate Resources using SwiftGen
Once you have done with your configuration files, you can generate SwiftGen code. To generate code for all the resources, you have to run swiftgen command in terminal.
if you have installed SwiftGen using CocoaPods, then you have to run this command at the location of your project.
You will get this messages in the terminal if resource files generate successfully

If you have installed SwiftGen using Homebrew, then you have to simply run this command.
This command will read the configurations from your swiftgen.yml files and generate Swift code that makes your resources easily accessible in your Xcode project. The generated code will be placed in the output files specified in your swiftgen.yml file.
Every-time you make any change in your resource files, you have to run the above command. But you can avoid this by adding this command in Build Phases of the project. Here is how:
- Go to your Project Target and select the Build Phases tab.
- By clicking on the “+” select New Run Script Phase
- Paste code generation script in shell
4. Move script below [CP] Check Pods Manifest.lock script.
5. Now just press ⌘ + B to generate SwiftGen Code. Using this no need to run command in the terminal.
If generated files are not showing in the xcode then you have to drag generated files from finder to xcode as shown below
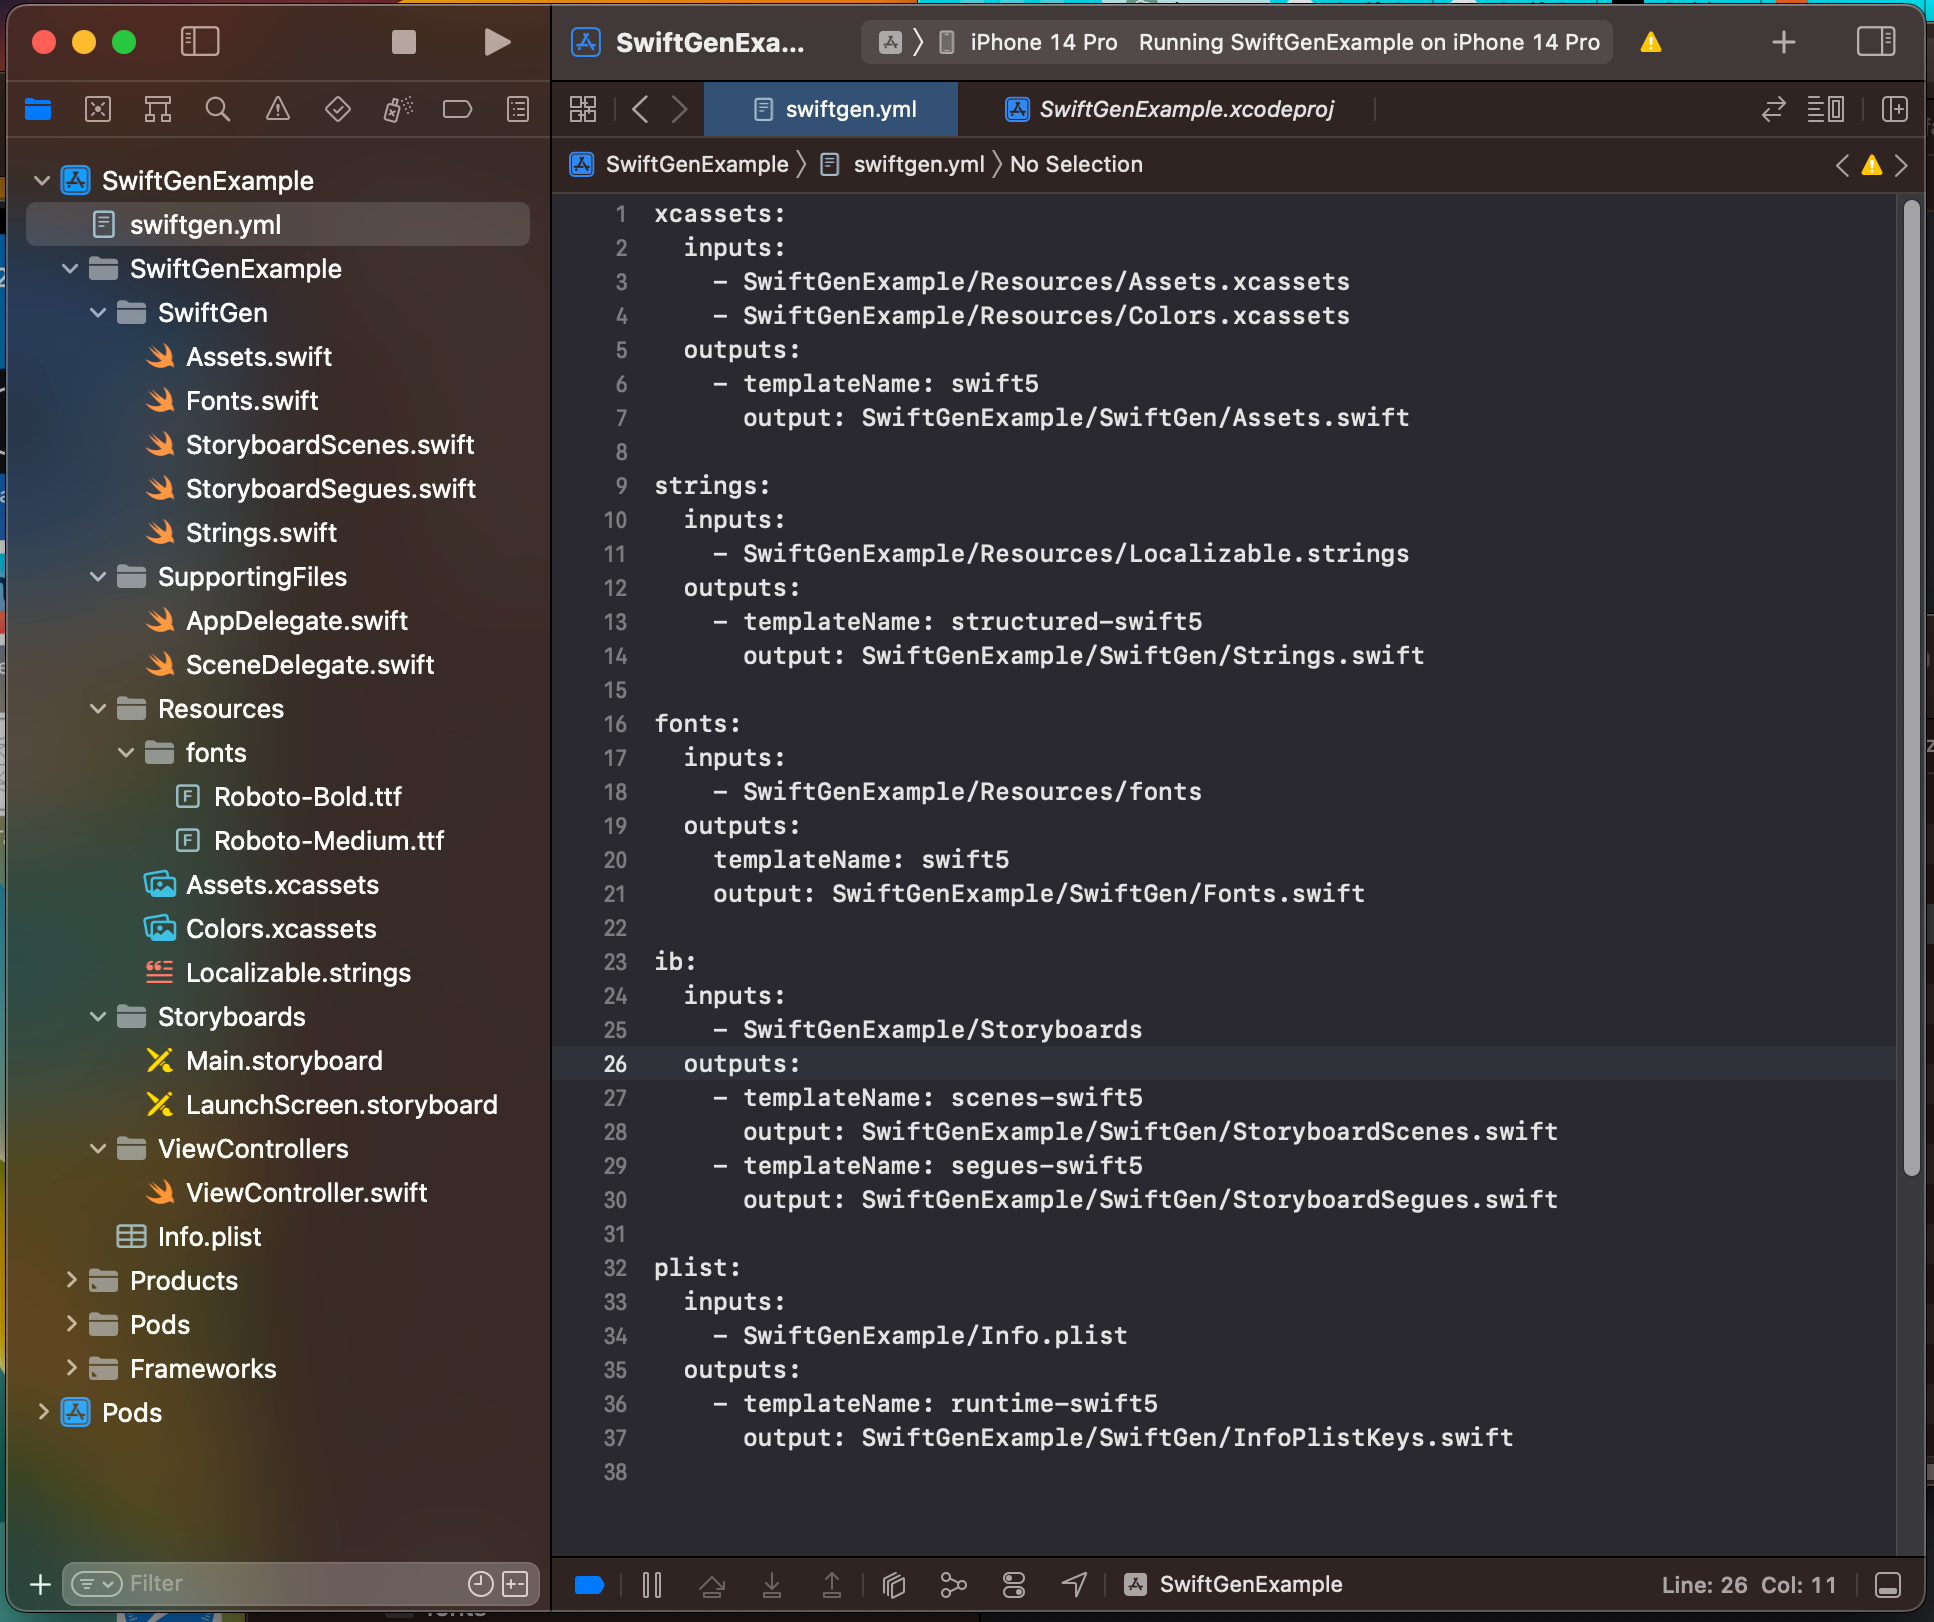
After successfully implementation of SwiftGen, your xcode project strucure and swiftgen file will be looks as below
Step - 4 Use the Generated Code
You can now use the generated Swift code in your iOS project.
- For use of generated assets: You can use the generated enums to access your assets:
let image =Asset .Assets .myImage.imagelet color =Asset .Colors .myColor.color
- For use of generated strings: To access localized strings, you can use the
L10nenum provided by SwiftGen/Strings:
let helloWorld =L10n .helloWorld
- For use of generated fonts: To access generated font, you can use the
UIFontprovided by SwiftGen:
let lableBold = UILabel()let lableMedium = UILabel() lableBold.font =UIFont (font: FontFamily.Roboto.bold, size: 16) lableMedium.font =UIFont (font: FontFamily.Roboto.medium, size: 16)
- For use of generated scenes: You can instantiate scenes using the
instantiatemethod
// StoryboardScene.storyboardName.viewControllerStoryboardId.instantiate() let viewController =StoryboardScene .Main.viewController.instantiate() self.navigationController?.pushViewController(viewController, animated: true)
- For use of generated Plist: You can access generated plist using generated enums
// This will be an array let foo =PlistFiles .ShoppingList.items// This will be an String let bar =PlistFiles .apiKey
That's it! You've successfully implemented SwiftGen in your iOS project, which should help you efficiently manage and use resources like strings, assets, and fonts etc. SwiftGen simplifies the resource management process and reduces the risk of manual errors when accessing these resources.